A Step-by-Step Guide to Installing WiX Toolset 4
The WiX Toolset is a powerful open-source toolkit that allows developers to create Windows Installer (MSI) packages for software deployment. WiX simplifies the process of creating installers for your applications. In this guide, we’ll walk you through the steps to install WiX Toolset 4 on a Windows-based system.
Prerequisites
Before you begin the installation process, ensure you have the following prerequisites in place:
- A Windows Operating System: WiX Toolset primarily targets Windows for software packaging, so make sure you’re using a Windows machine.
- Administrator Access: You need administrator rights on your computer to install software.
- .Net: Ensure you have .NET (dotnet) 7 SDK installed. We have a guide for this if needed here.
Now, let’s dive into the installation steps:
Step 1: Download the WiX Toolset 4 Installer
- Open a command prompt window as Administrator
- Double check you have .NET installed, in CMD type the below. The response should be 7. something. If this isn’t the case I suggest revisiting the dotnet installaion guide.
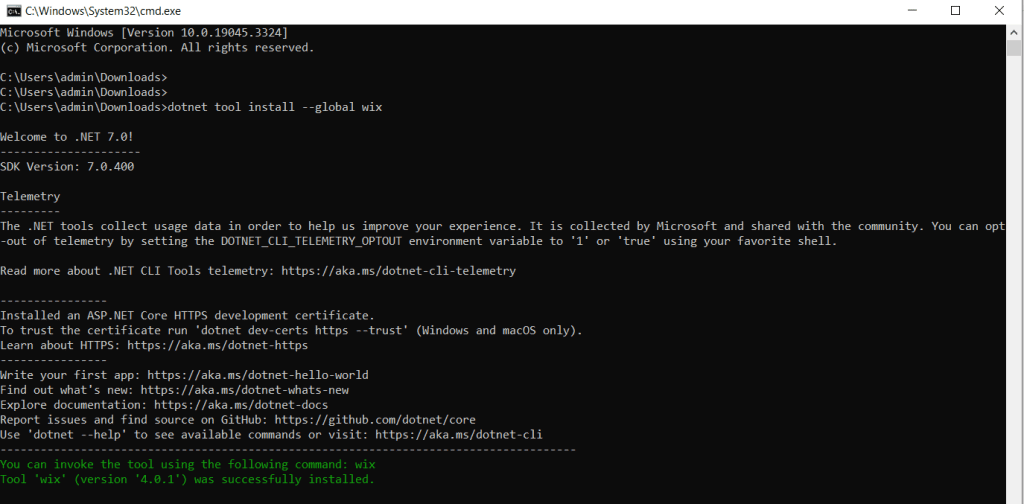
dotnet --version- Now we have verified the dotnet installation, run the following command to install WiX Toolset 4 CLI
dotnet tool install --global wix- When completed the terminal window will show a green message stating WiX tool has been succesfully installed as per the below screenshot.


